Vinyl tiles are incredibly popular, and it's no surprise why so many people choose this flooring option. Thanks to their remarkable durability, they are commonly used to tile floors in commercial properties and public places such as airports, train stations, schools, and hospitals.
However, vinyl tile flooring is also an excellent option for residential properties. The most high-traffic rooms in your home, including the kitchen, living room, and bathroom, will look brighter and livelier thanks to the vinyl floors.
With so many people opting for this flooring choice, there are a lot of curious minds about how to lay vinyl tiles, and today, we'll tell you just that.
The Benefits of Choosing Vinyl Tiles for Your Floors
But first, if you're wondering whether you should tile your floors, these benefits could sway you into voting yes:
- Natural Aesthetics: These flooring materials offer the visual and tactile qualities of natural substances like stone, wood, marble, or granite.
- Long-Lasting Durability: Vinyl's exceptional strength and durability mean manufacturers can extend warranties ranging from 10 to 35 years.
- Enhanced Abrasion Resistance: They exhibit remarkable resistance to wear and tear, thanks to the incorporation of mineral crumb or quartz sand.
- UV Fade Resistance: These materials resist UV irradiation, ensuring their original color remains unchanged.
- Waterproof Versatility: Their waterproof properties make them suitable for tiling in high-humidity areas, outdoor spaces, or even swimming pools.
- Stability in Various Conditions: They remain resilient in the face of fluctuations in humidity and temperature.
- Robust Against Mechanical Pressure: These materials are highly resistant to mechanical stress, preventing cracks, chips, scratches, or dents.
- Affordable Pricing: Additionally, they come at a cost-effective price point.
We also discuss the pros and cons of tile vs. hardwood flooring here.
Do I Need To Use Grout On My Vinyl Floor Tiles?
No! In fact, this is another benefit of vinyl tiles, and it's one many people aren't aware of. Fortunately, there's no need to use grout when installing vinyl floor tiles.

Can I Install Vinyl Floor Tiles Myself?
Like many home improvement projects, you can DIY a vinyl floor tile project. With some basic tools and careful attention to detail, you can easily install vinyl tiles in your home.
If you're not confident in your abilities or don't have the time to devote to the project, hiring a professional installer with experience working with vinyl flooring materials is the way to go.
Step-by-Step Guide to Laying Vinyl Floor Tiles
If you have decided to take on the project of laying vinyl floor tiles yourself, here is a step-by-step guide to help you through the process:
1. Create a Plan with a Layout that Fits Your Space
Before buying floor tile and cutting them, create a detailed plan for how you want your vinyl floor tile layout to look. This will ensure you have enough tiles and that the final result will fit your space perfectly.
2. Lay Down Your Tile First to Be Sure of the Tile Layout
Once you have a plan, it's a good idea to lay down the tiles without adhesive first. This is a handy way to allow yourself to make any necessary adjustments before permanently installing them.
3. Install Vinyl Underlayment
Before laying down the tiles, you'll need to install a layer of underlayment. This layer provides a smooth and level surface for your tiles to adhere to.
4. Cut Your Vinyl Tiles to the Desired Shape and Size
Using a sharp utility knife, carefully cut your vinyl tiles to fit any areas requiring smaller or irregularly shaped pieces.
5. Prepare Your Surface and Trim Down Any Door Openings
Before applying the adhesive, make sure your surface is clean and free of any debris. Also, trim down any door openings to be sure the tiles fit just right.
6. Apply The Adhesive
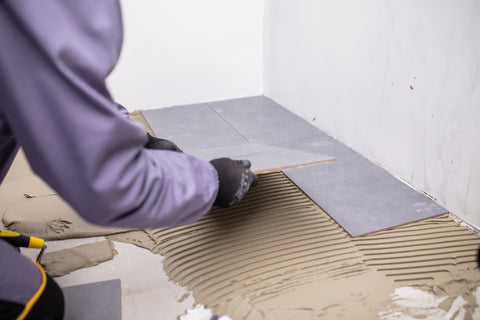
Apply adhesive to the surface in small sections using a notched trowel. This prevents the adhesive from drying too quickly.
7. Get Rid of Bumps and Bubbles
As you lay down each tile, use a rolling pin or flooring roller to eliminate any bumps or bubbles in the adhesive.
8. Start Tiling at The Center of The Room
To be sure you lay all the tiles down evenly, start tiling from the center of the room and work your way out towards the edges.
9. Set The Vinyl Tiles with a Roller
After you lay the vinyl tile, use a rolling pin or flooring roller to firmly set them in place.
10. Get Rid of Excess Adhesive
Using a damp sponge, remove any excess adhesive from the surface of the tiles before it has a chance to dry.

11. Don't Wash Your Tile To Give Adhesive Time To Cure
Resist the urge to wash your new tiles immediately after installation. Let the adhesive cure for at least 24 hours before exposing it to water or cleaning products.
How to Maintain Vinyl Tiles
As much as vinyl tiles are durable and long-lasting, they still benefit from some maintenance.
Here are some tips for how to keep your vinyl tiles looking great for years to come.
- Use Mats at Entrances: Place mats near entrances to prevent dirt in the room. They capture debris, helping your tiles maintain a fresh appearance for longer.
- Choose Neutral Detergents: When cleaning vinyl tiles, opt for detergents with a neutral composition—nothing too abrasive or strong
- Avoid Bleach and Ammonia: Steer clear of bleach or ammonia detergents, as they can harm vinyl surfaces.
- Specialized Vinyl Solution: The best choice is a specialized solution designed for vinyl flooring.
- Dry Wipe After Wet Cleaning: Wipe the vinyl tile floor with a dry cloth after wet cleaning.
- Consider Polishing for Tough Stains: Consider using a polishing machine for a thorough clean in extreme cases with very dirty surfaces.
Vinyl Tile Ideas
Need a little inspiration for the vinyl flooring in your home or business?
Here are three examples of vinyl flooring looks we love.
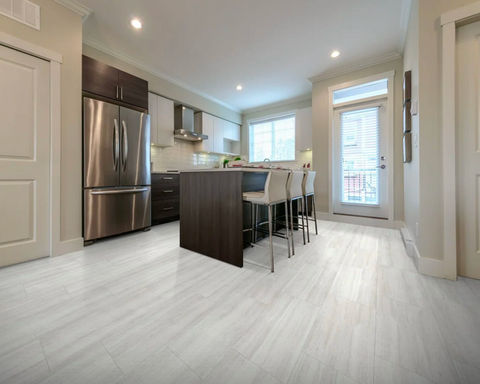
1. Light gray vinyl tile
This light gray vinyl tile combines style and functionality and is a versatile flooring option. Its elegant, neutral color adds a modern touch to any space, making it suitable for a wide range of interior design aesthetics. With high variation and realistic texture, it mimics the look of natural stone without the high maintenance.
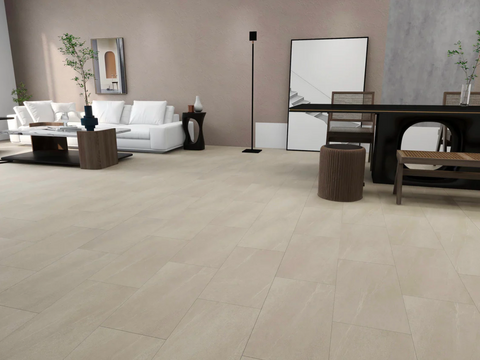
2. Sand beige vinyl tile

This is the way to go to achieve a classic, timeless look. Sand beige vinyl tile offers a warm, welcoming feel and pairs well with various design styles. Its low maintenance and durable wear layer is perfect for high-traffic areas.
3. Gray beige vinyl tile

With its unique blend of gray and beige tones, gray and beige vinyl tile can complement various interior decorating styles. This high-variation vinyl flooring replicates the look of natural stone, adding depth and visual interest to your space. Its four-sided painted V-groove edge gives it a more polished, finished look.
We have other helpful articles if you want to know how to tile over vinyl flooring!
Browse Our Wide Selection of Vinyl Floor Tiles
There you have it—all the helpful field advice you need on how to lay vinyl tiles in any room of your home or business, as well as some inspiration to get you started. Now that you know the basics, it's time to start shopping!
You're in the right place if you’re looking for affordable yet quality vinyl flooring options. Our collection of vinyl floor tiles is designed to be extremely durable and easy to maintain.
Shop luxury vinyl floor tile from Oasis Tile today to find exactly what you're looking for!


